Wednesday, October 27, 2010

Dining Room Makeover-Part Two: Walls...


Okay I'm a day late posting this but I wanted to get one final coat of paint on the beadboard before I posted pics.

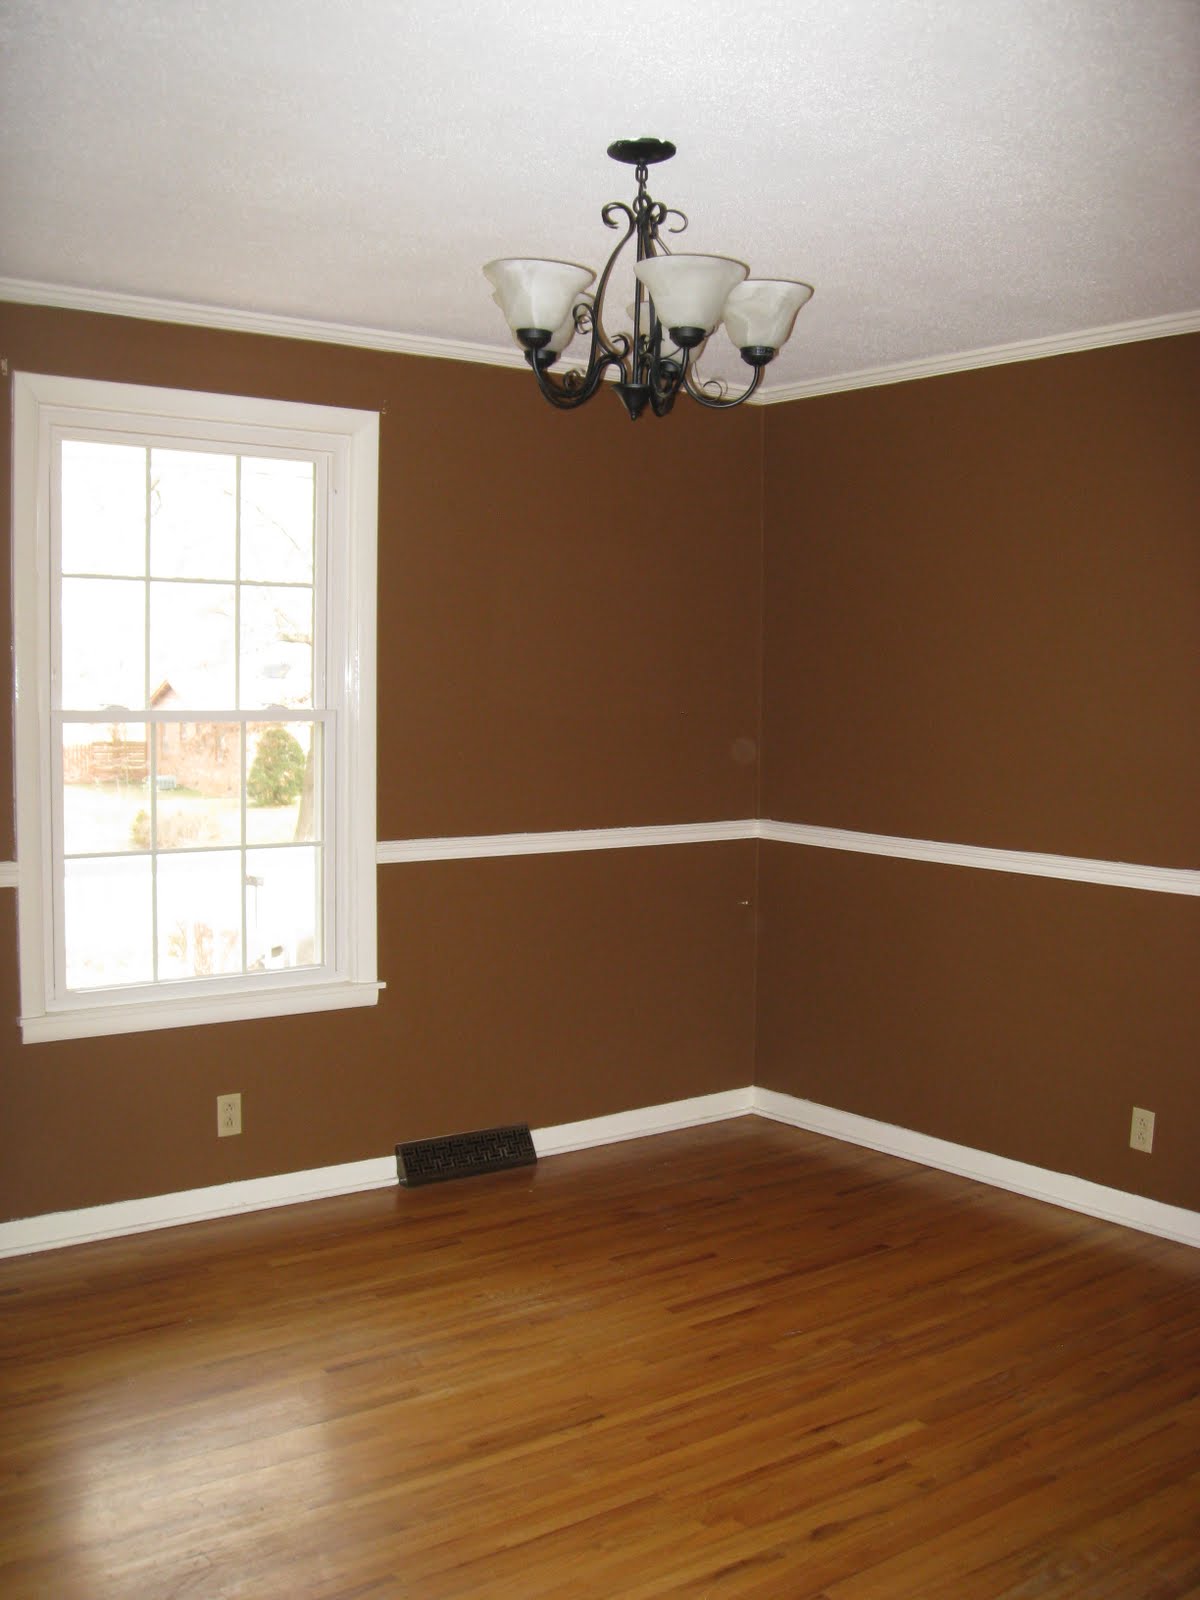
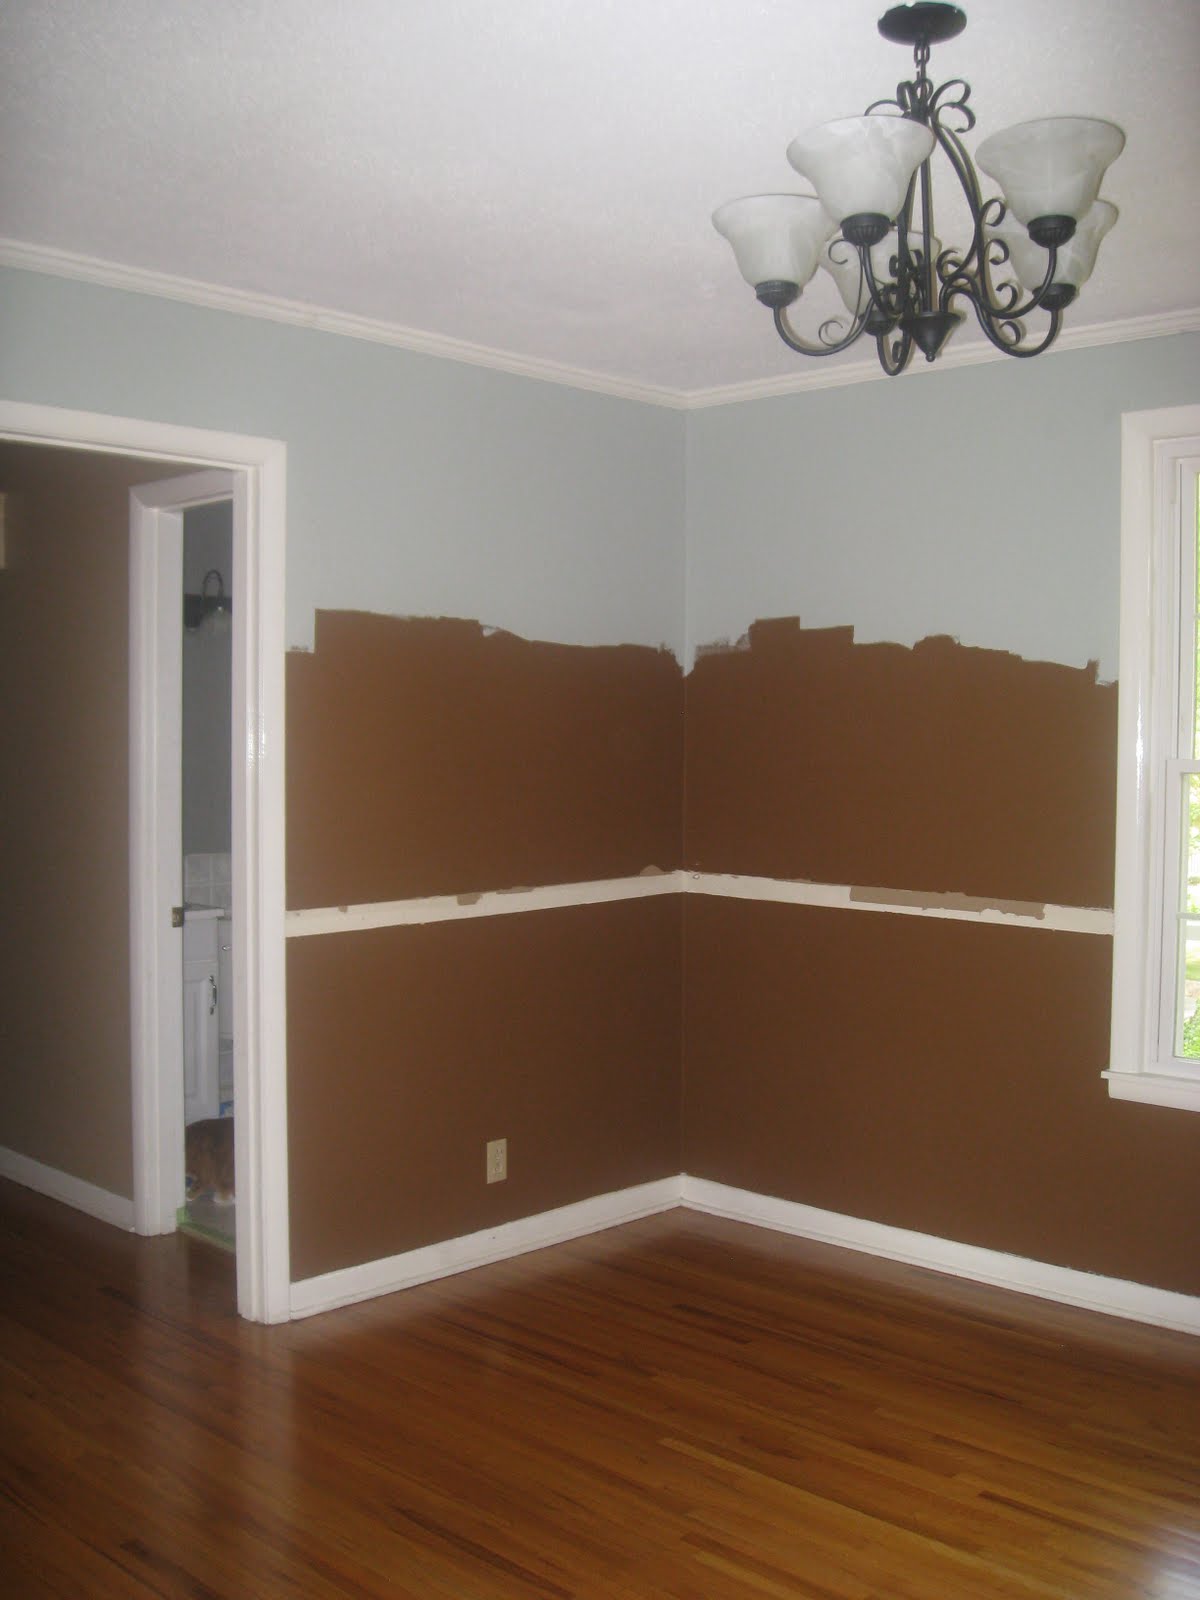
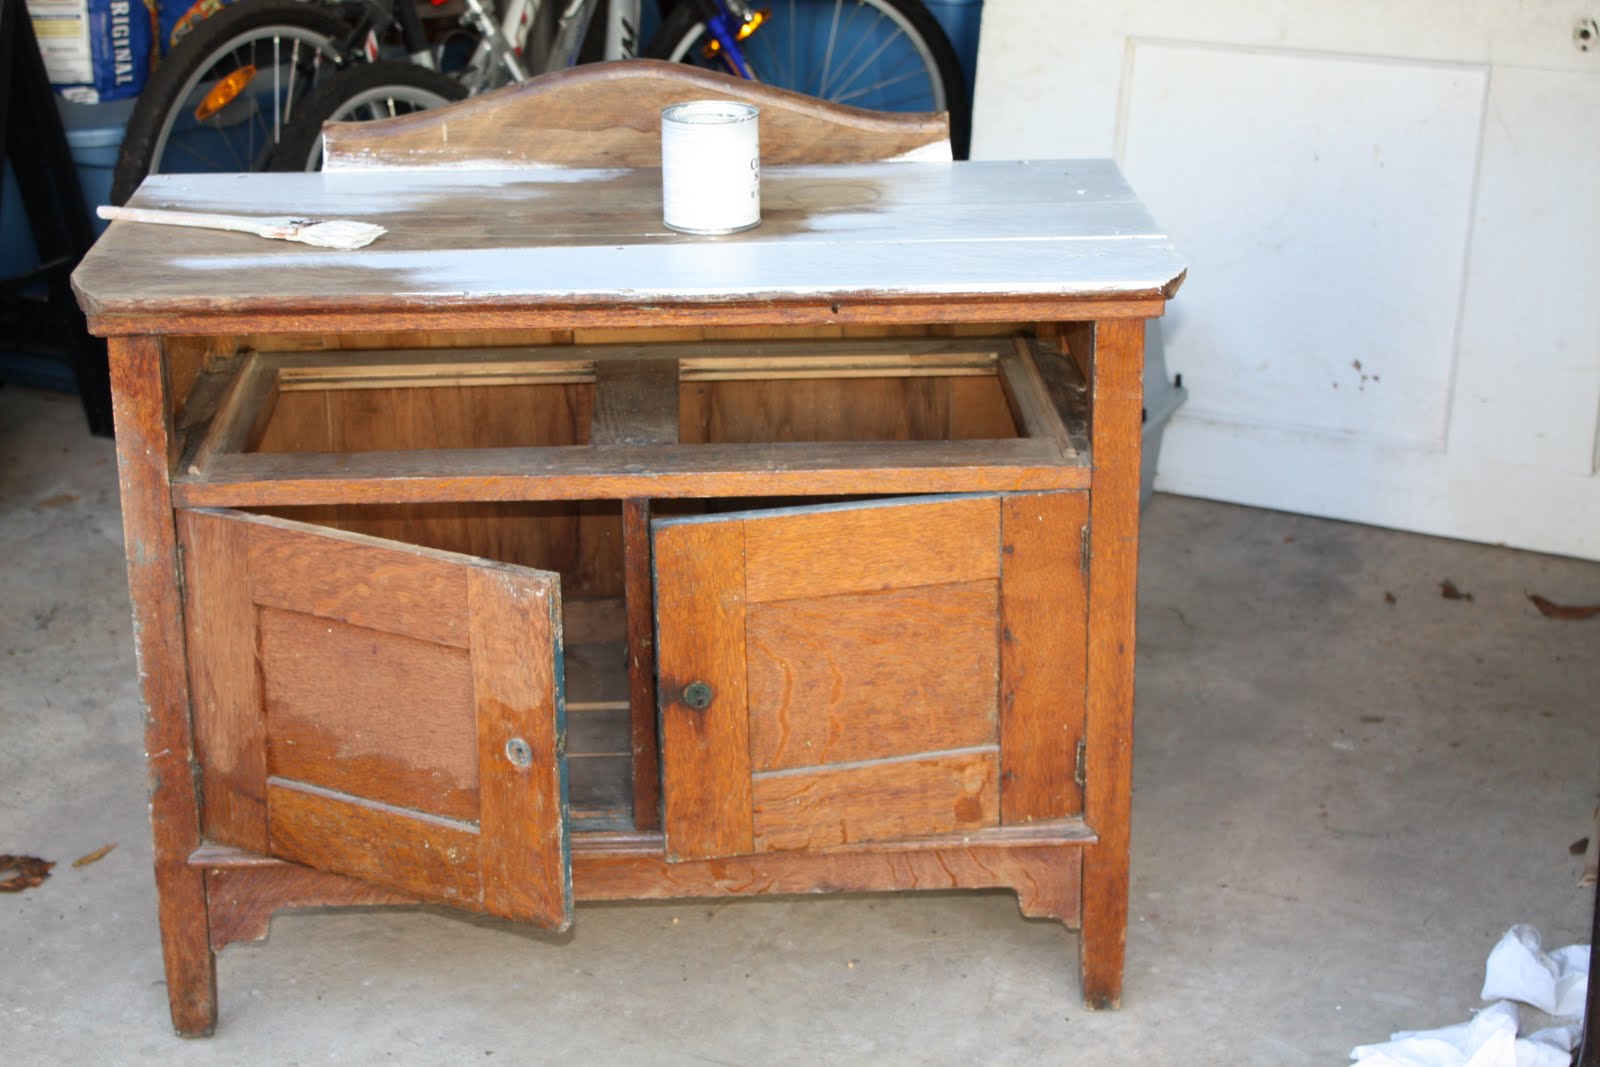
Here is the before once again.


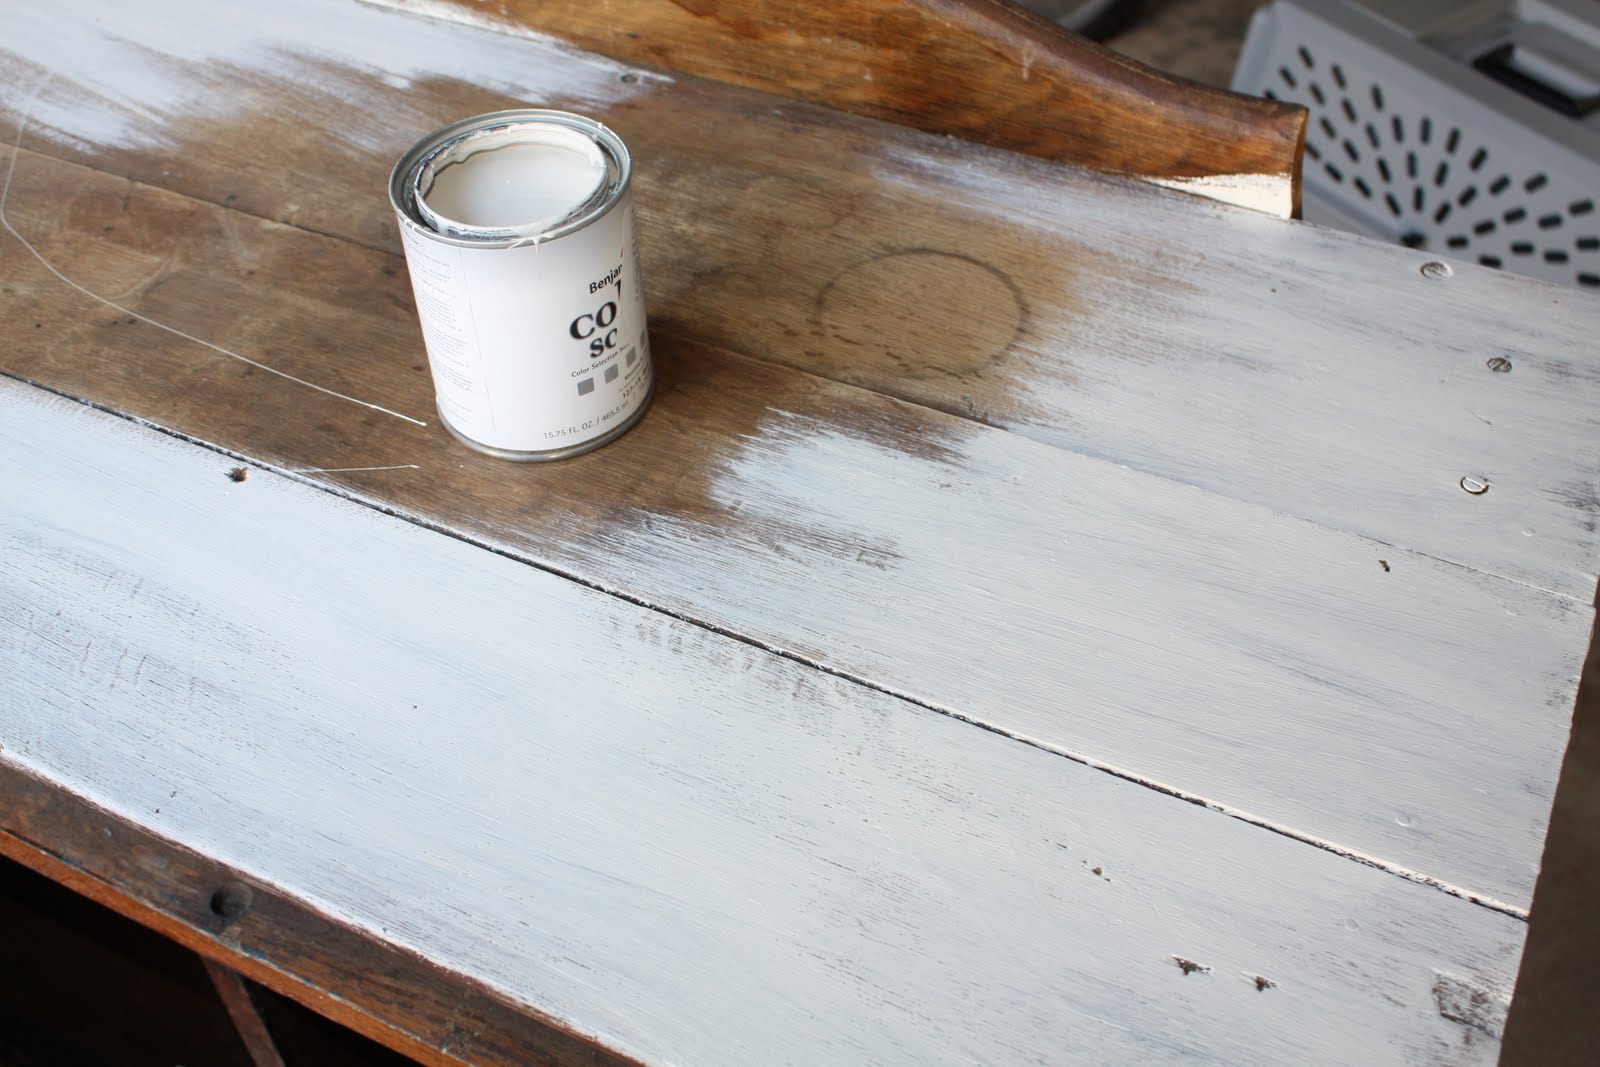
The previous owners had stained the center beam and surrounding trim a shade of orange, that didn't match anything.  We primed it using an oil base primer so the stain wouldn't bleed through the white paint.  The primer also allowed us to use a latex paint over an oil based stain.  


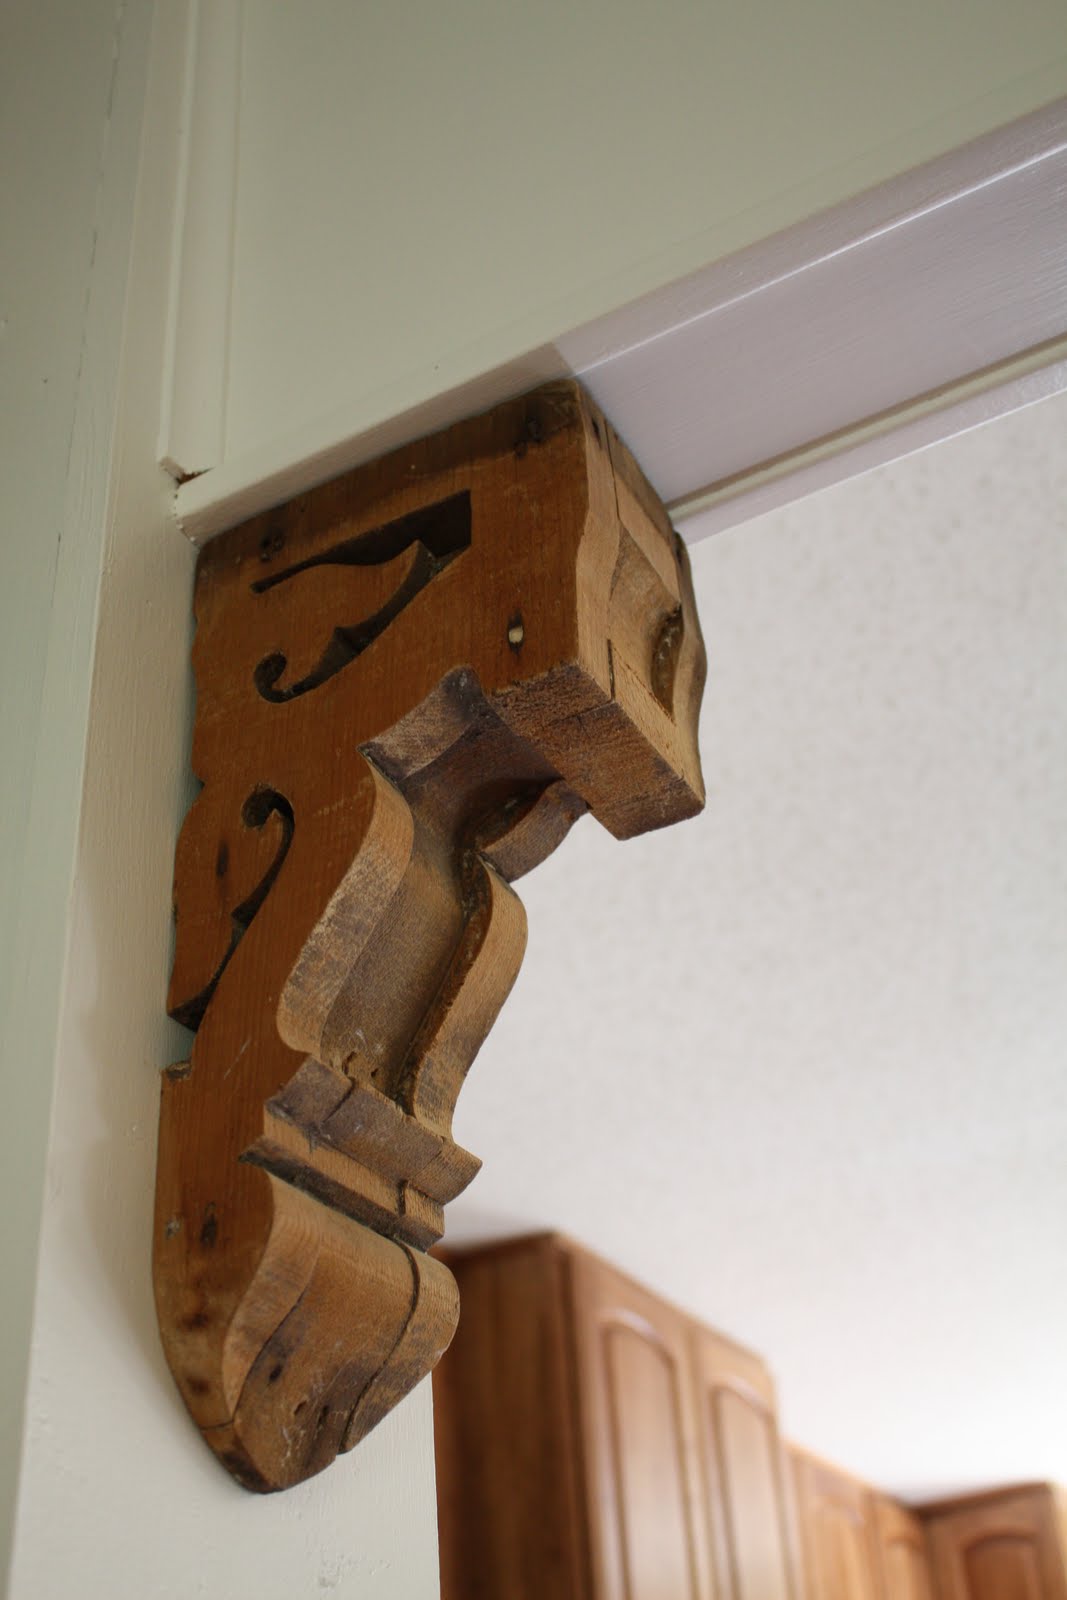
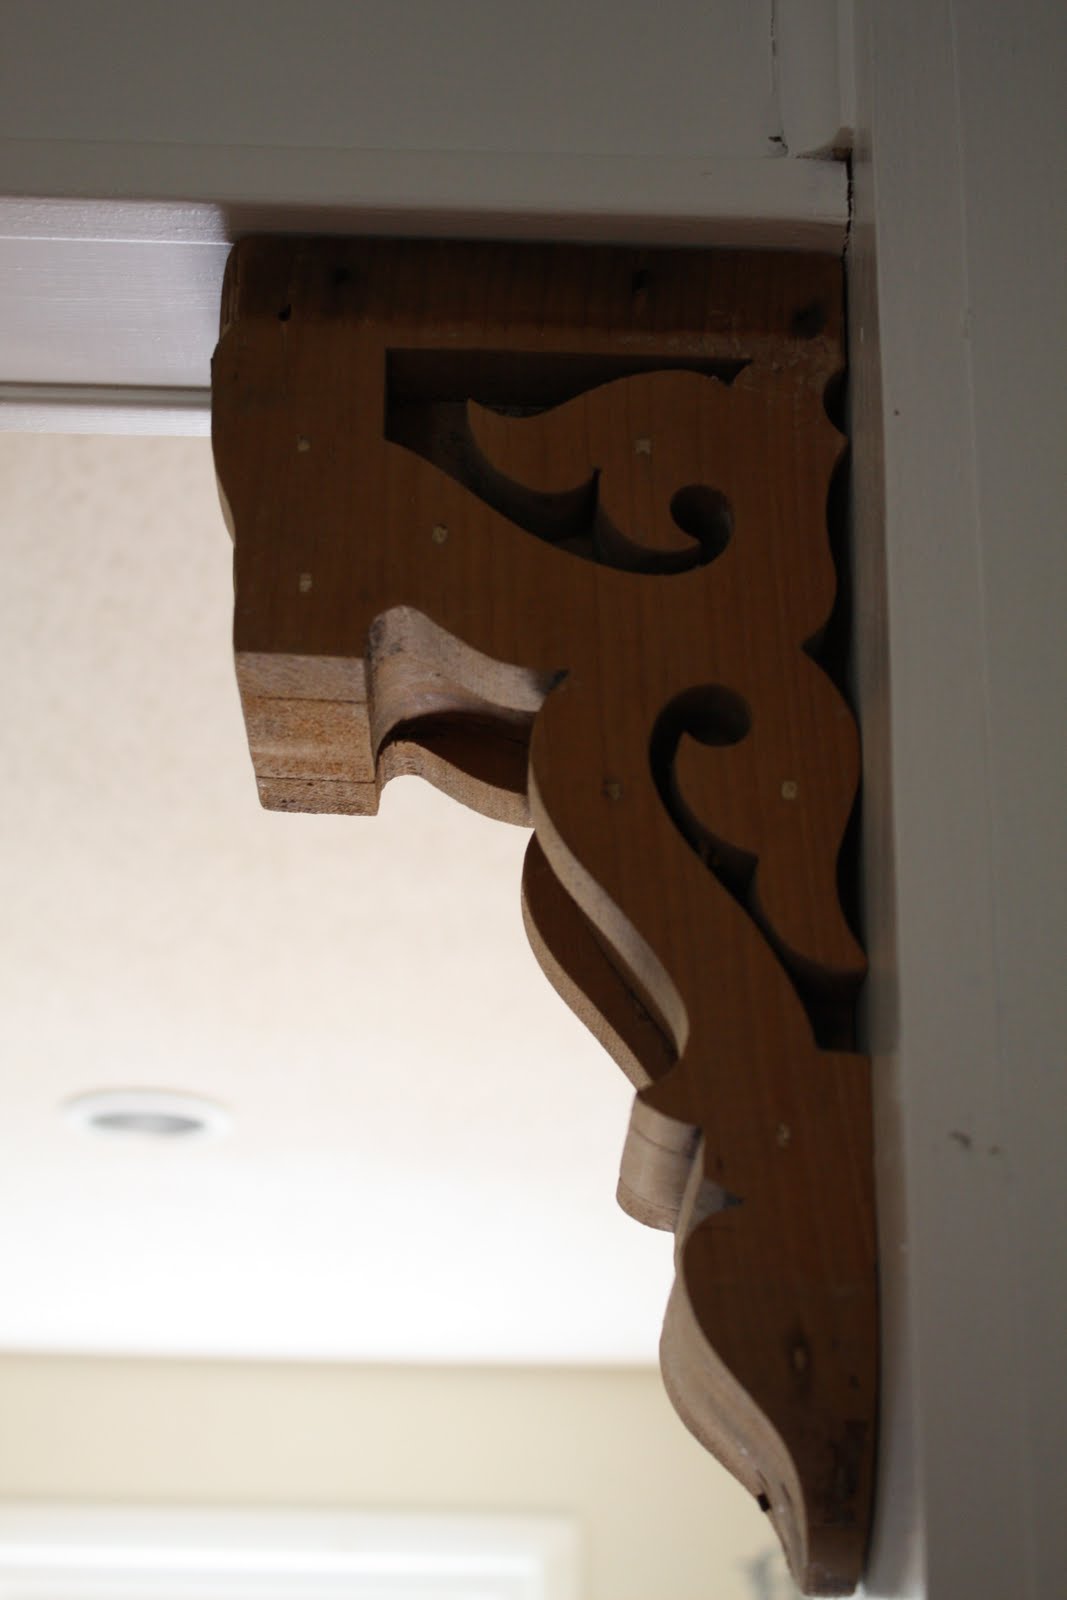
I found some antique corbels at a flea market and knew immediately I wanted to use them on our beam.  I left them in the original state.  I love their rustic look.  I wish I knew where they had been used before.  


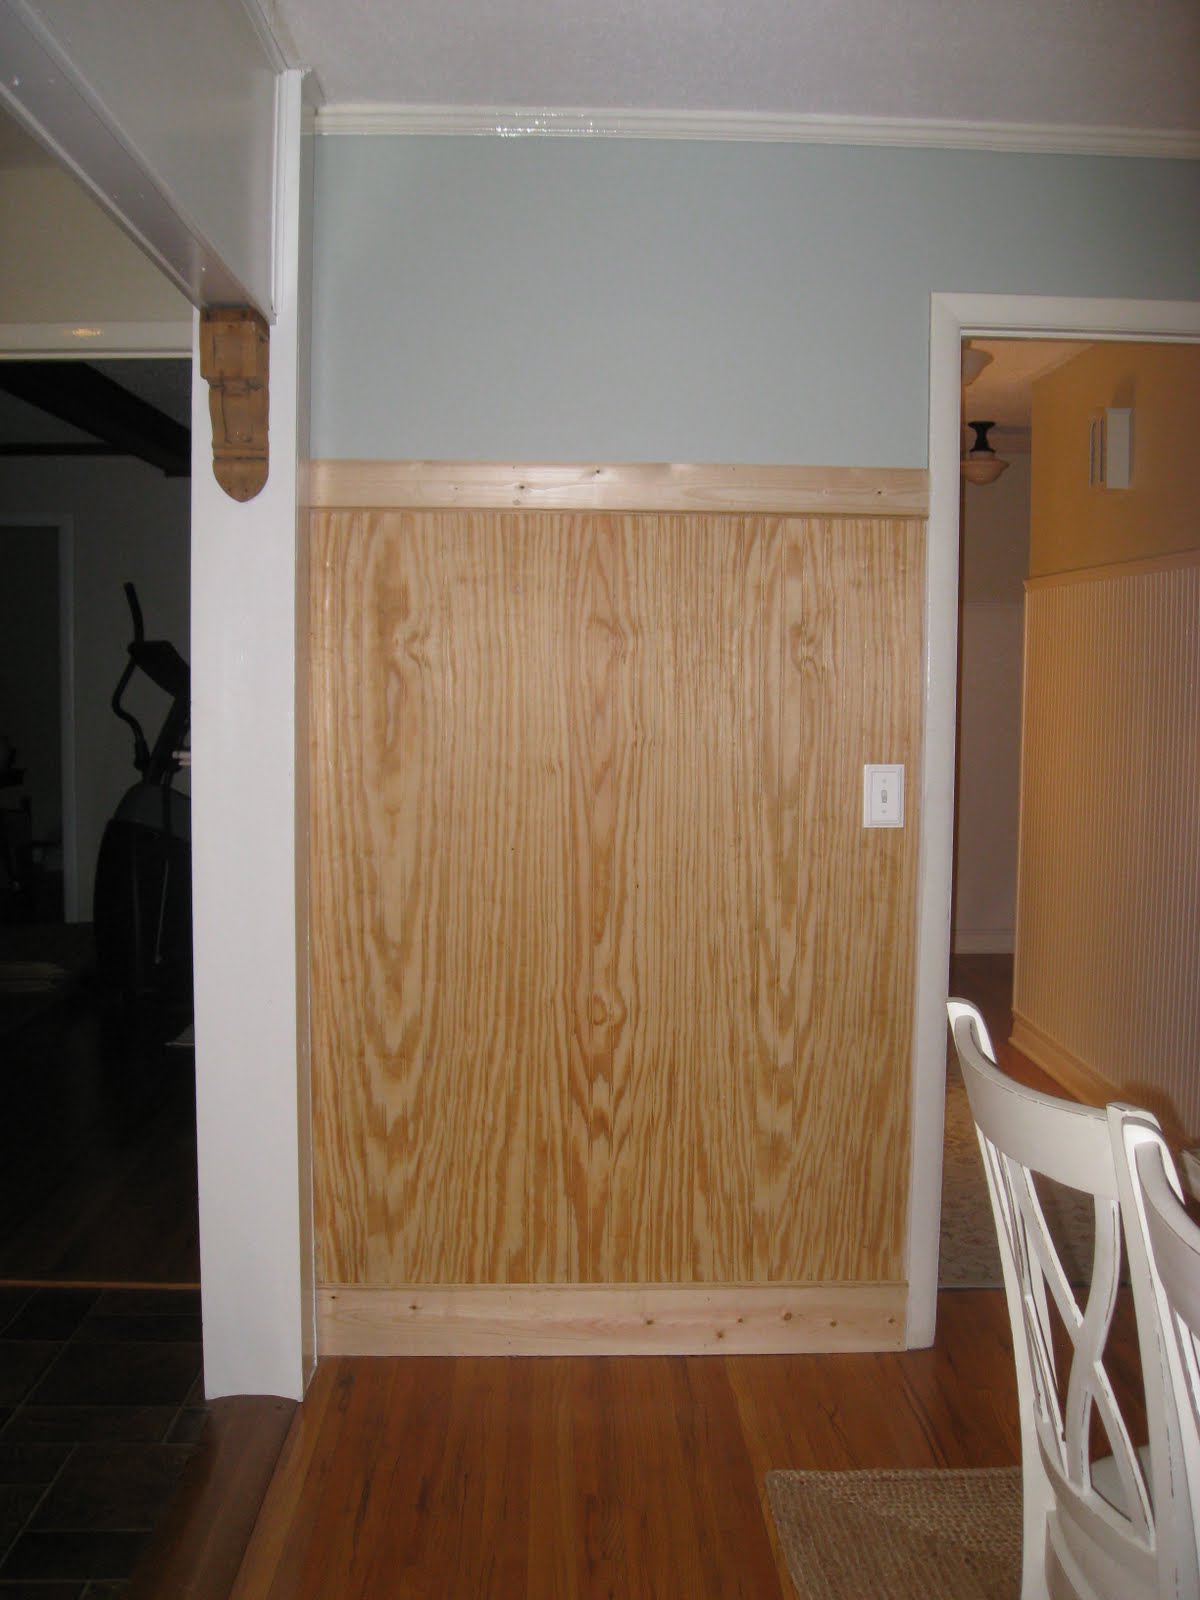
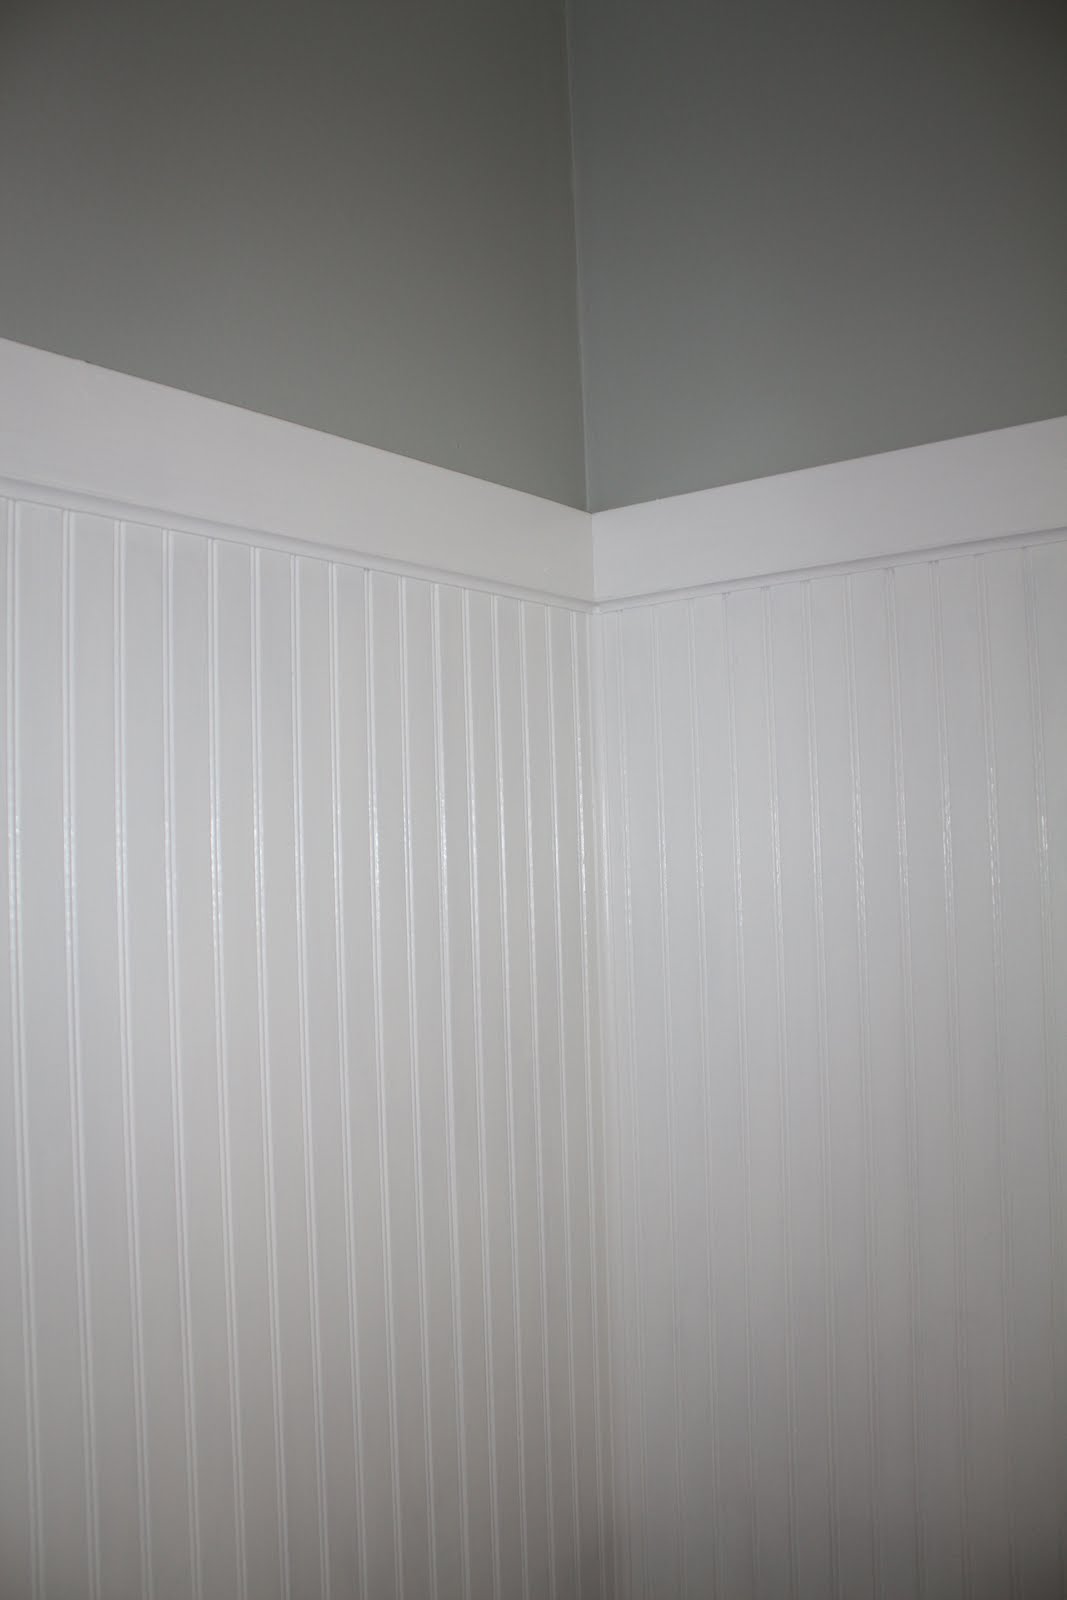
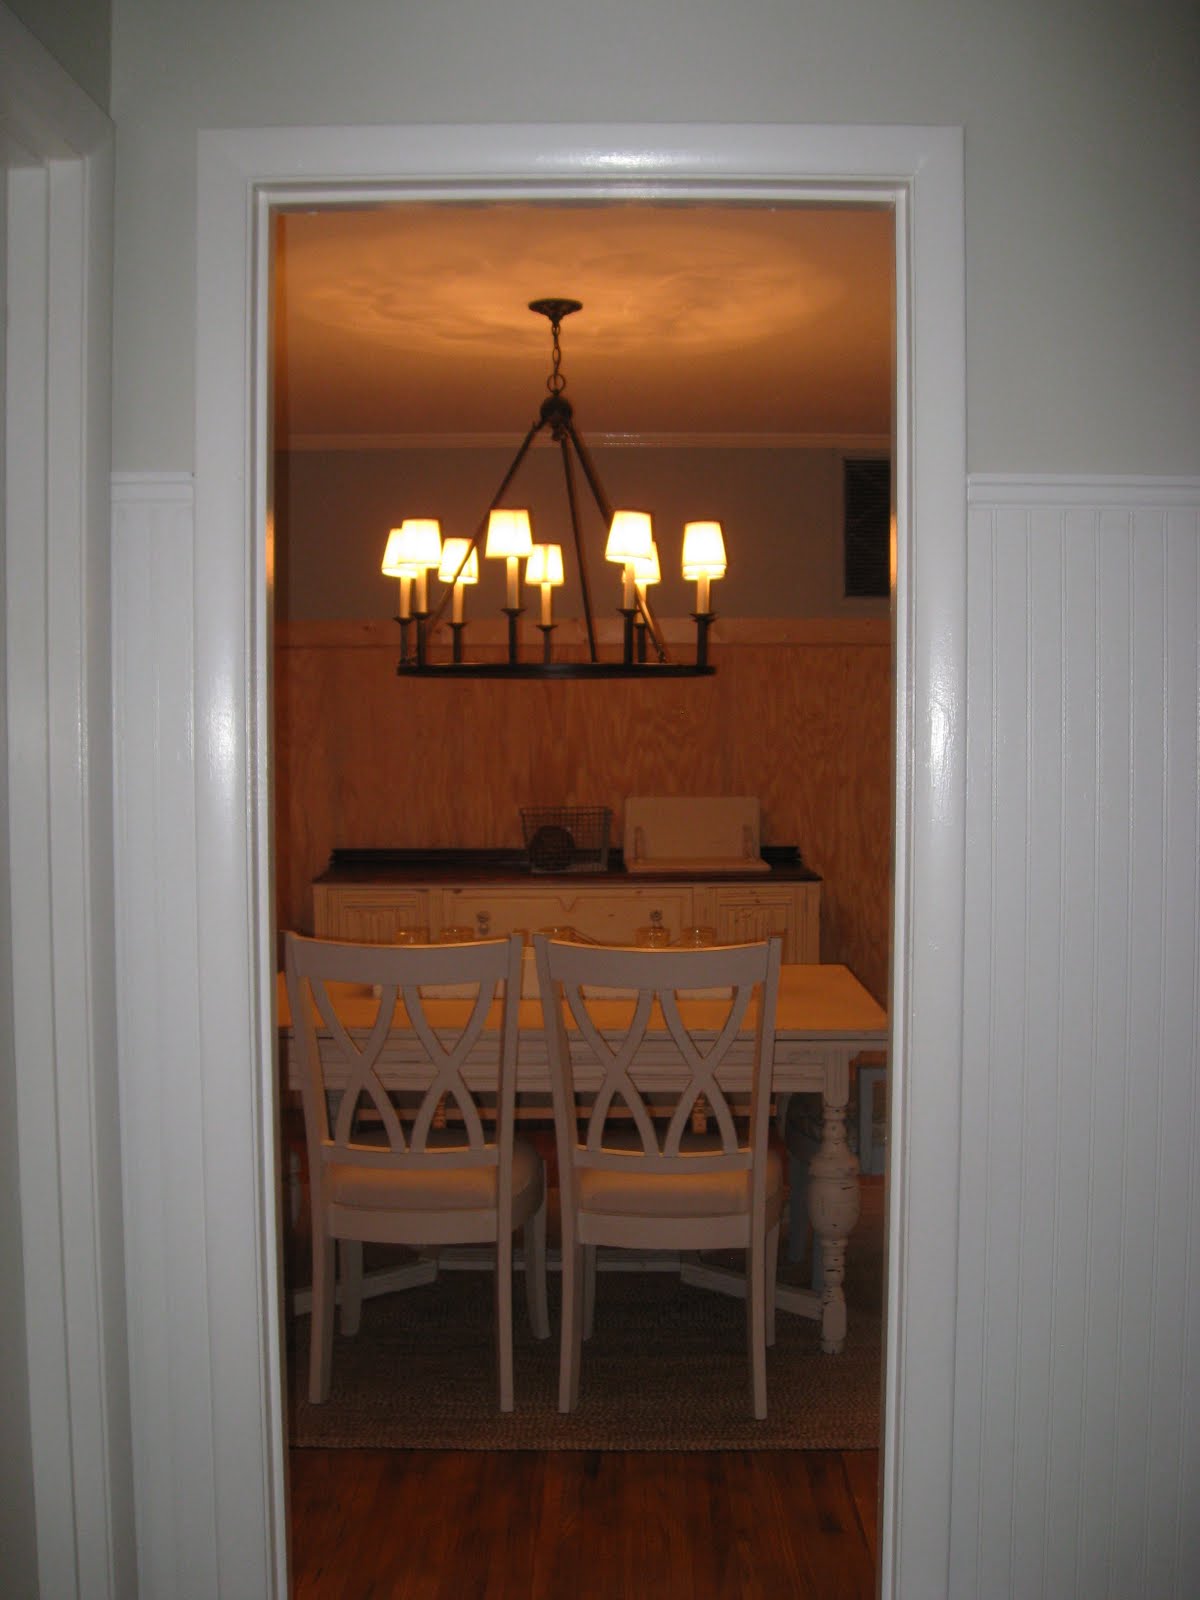
After we hung the beadboard in the hallway, I knew I wanted to continue it into the dining room and kitchen. But this time we needed to replace baseboards.  I love the look of chunky baseboards.  In fact, we have already replaced the baseboards in our den and used 1x6's (that's another post ;).  We loved how that turned out and decided to go that route.  


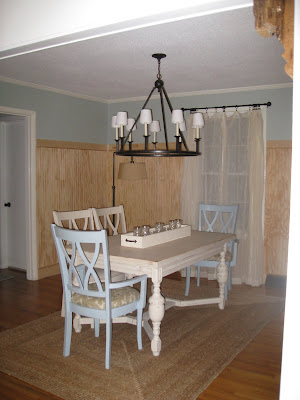
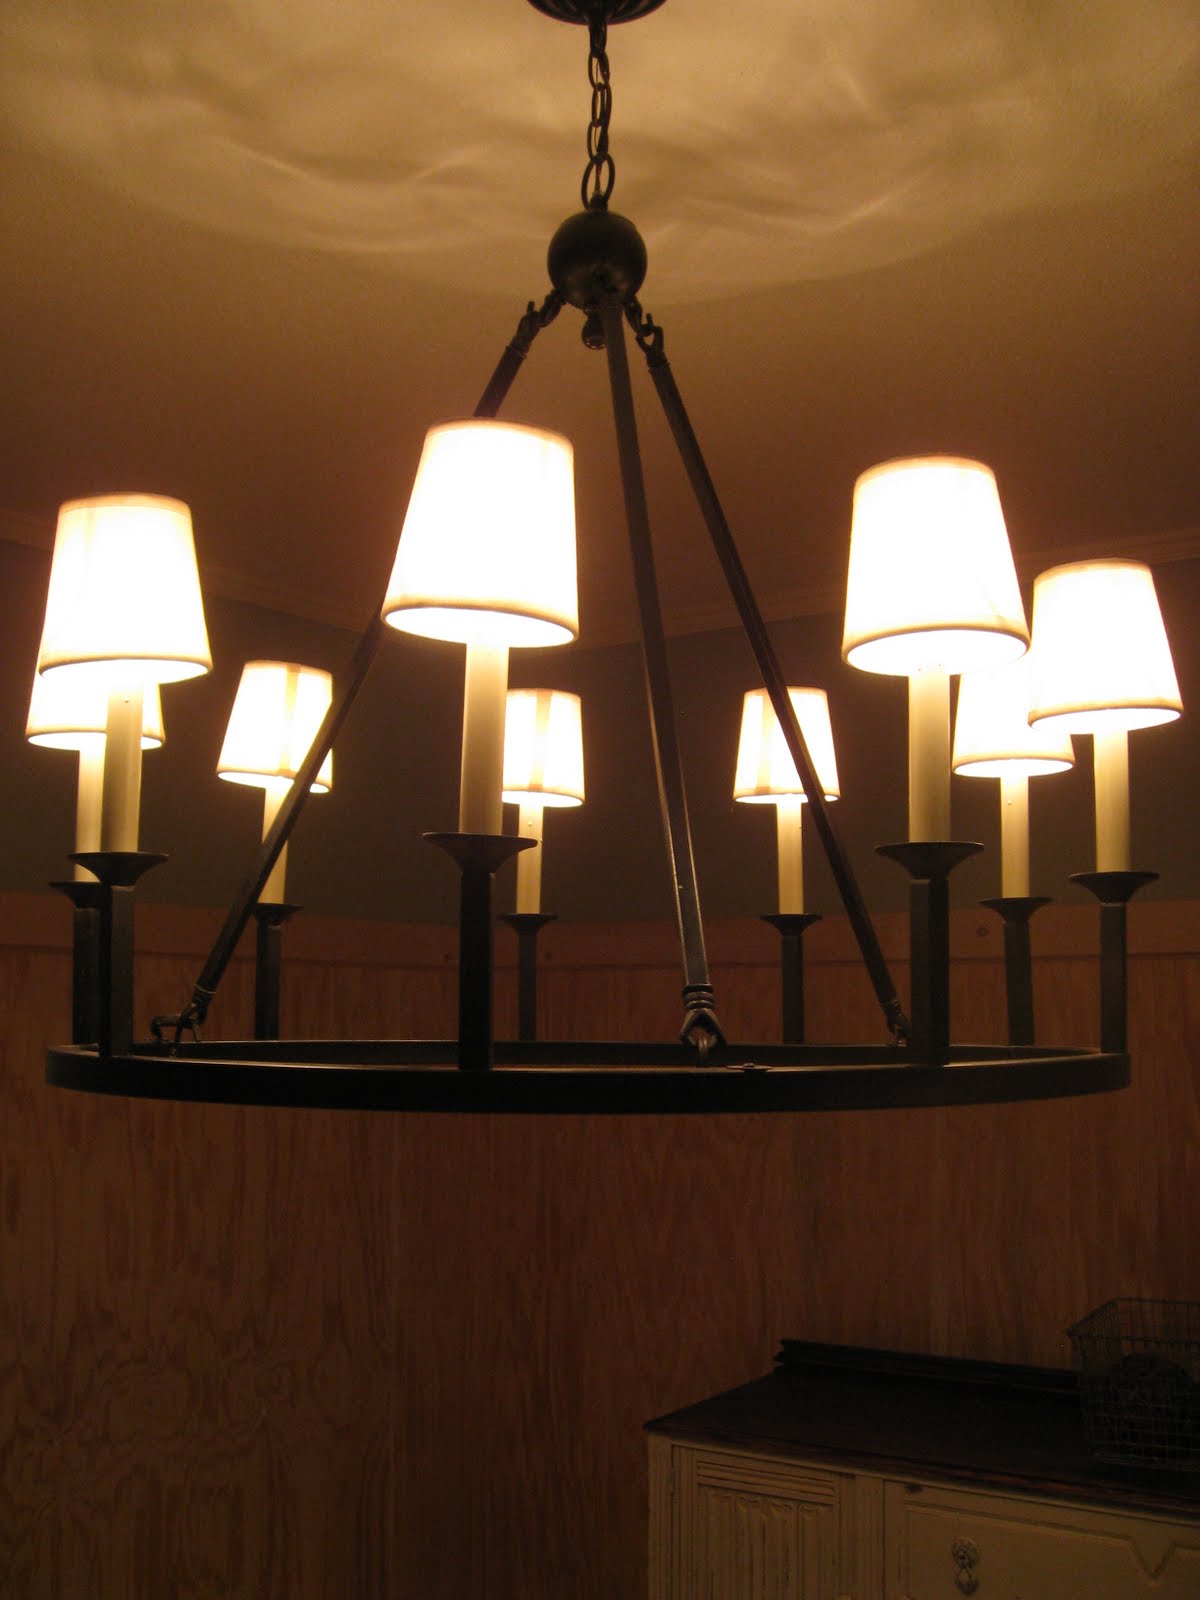
Sorry for the horrible night time picture!


We added a 1x4 to the top and then added smaller trim to both the top and the base boards.  Twice Remembered Cottage gives a great tutorial on installing beadboard this way.  It was such a great help to us!


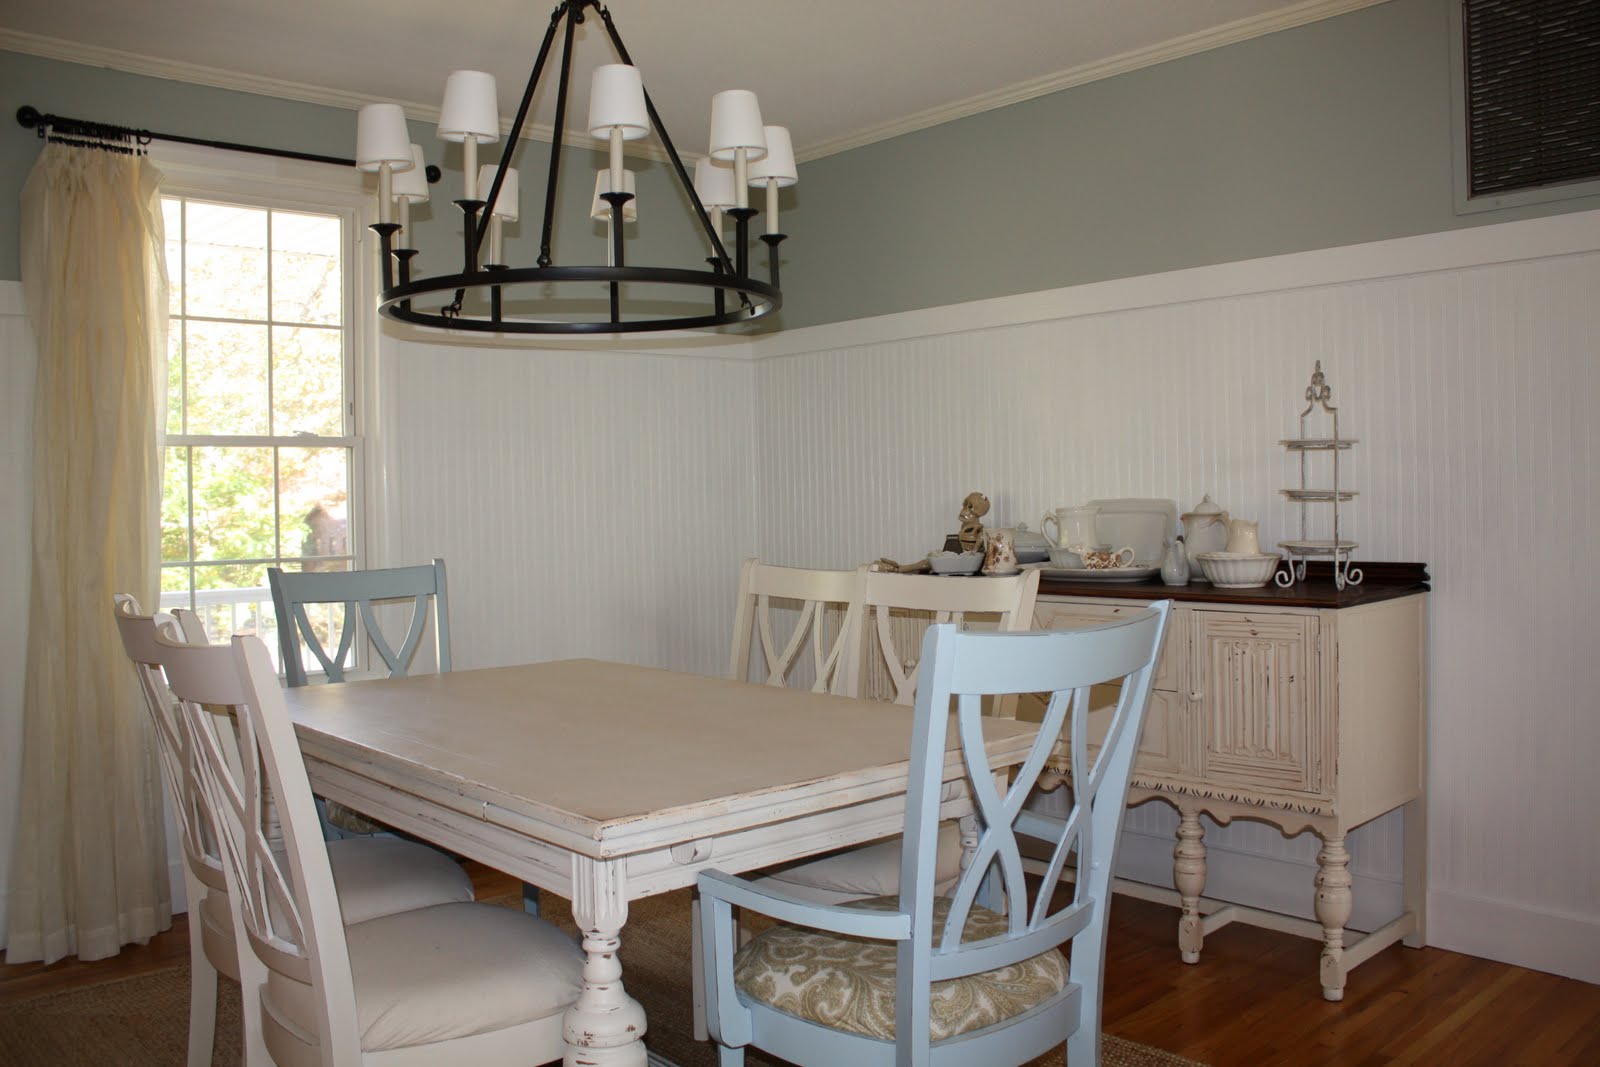
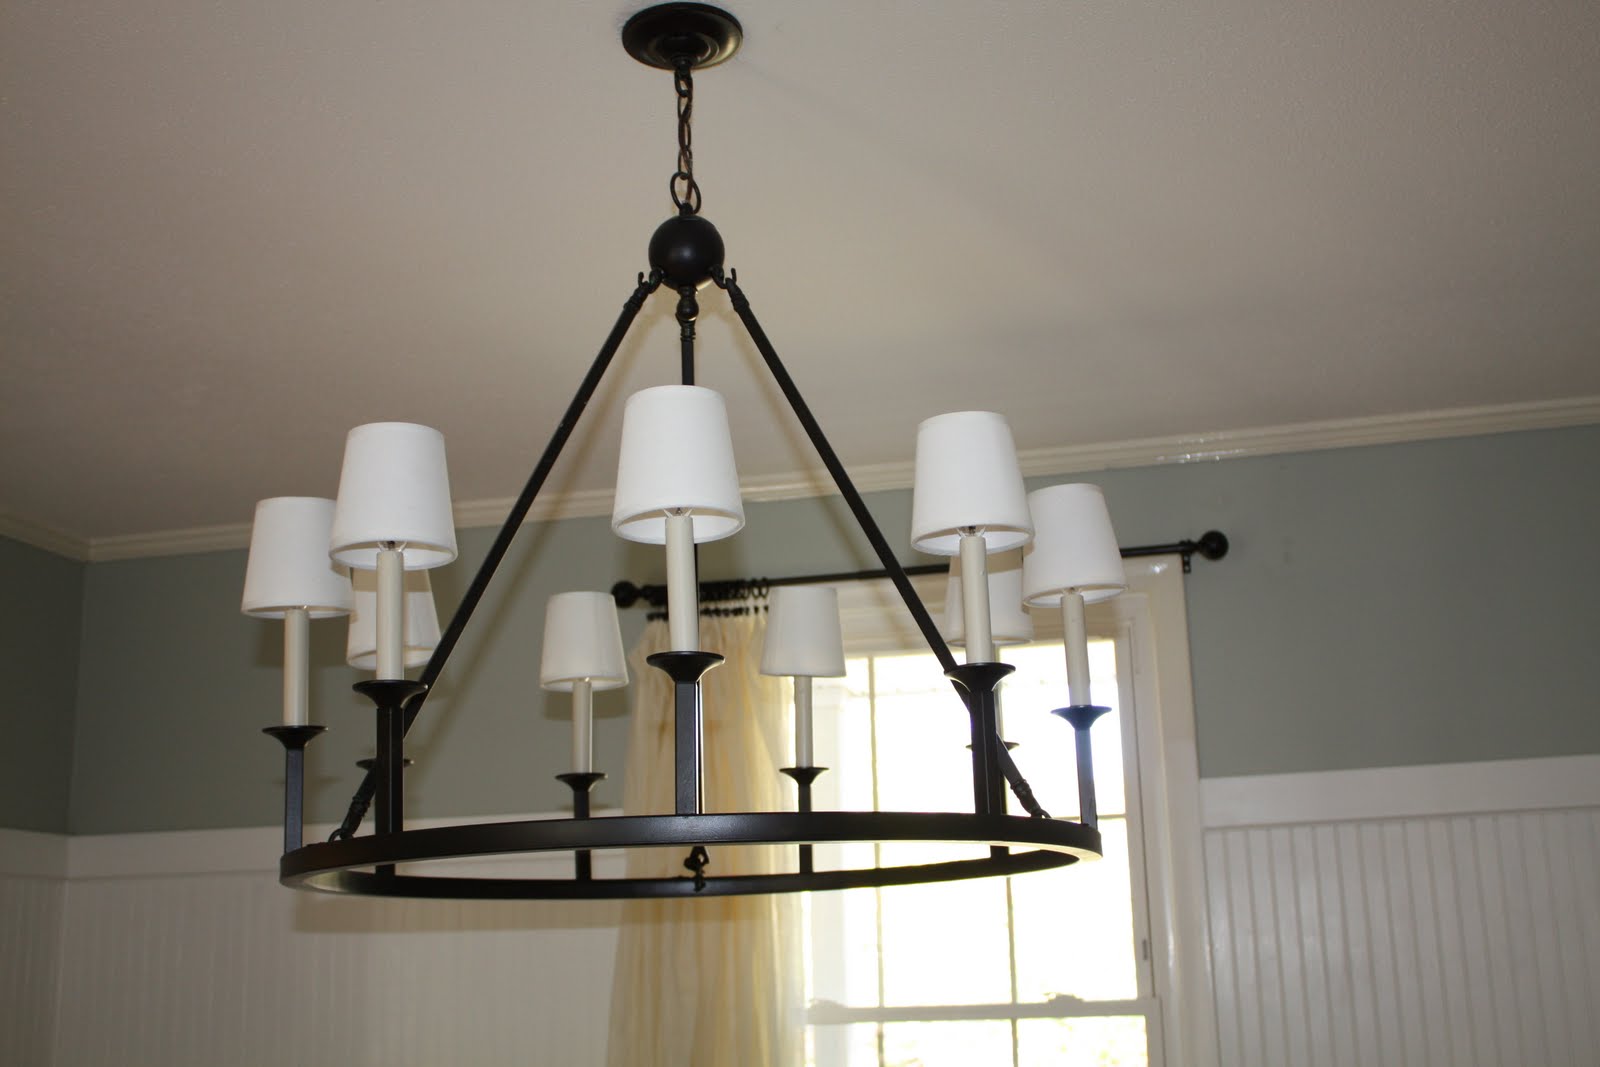
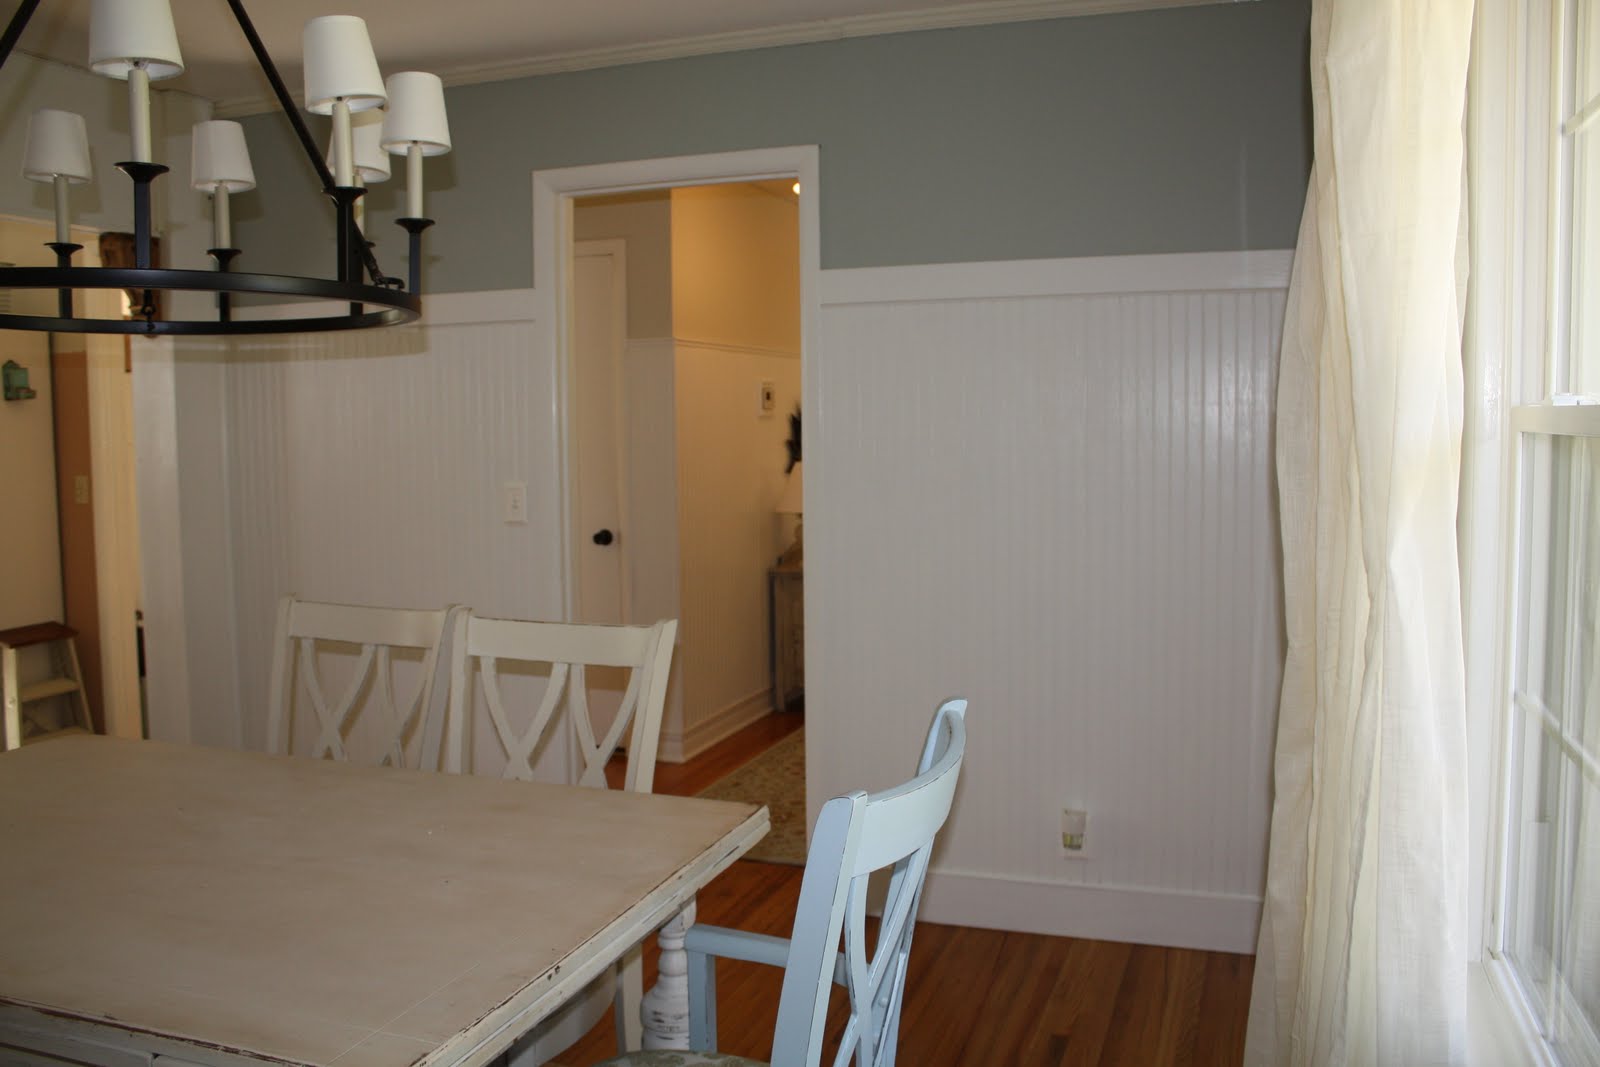
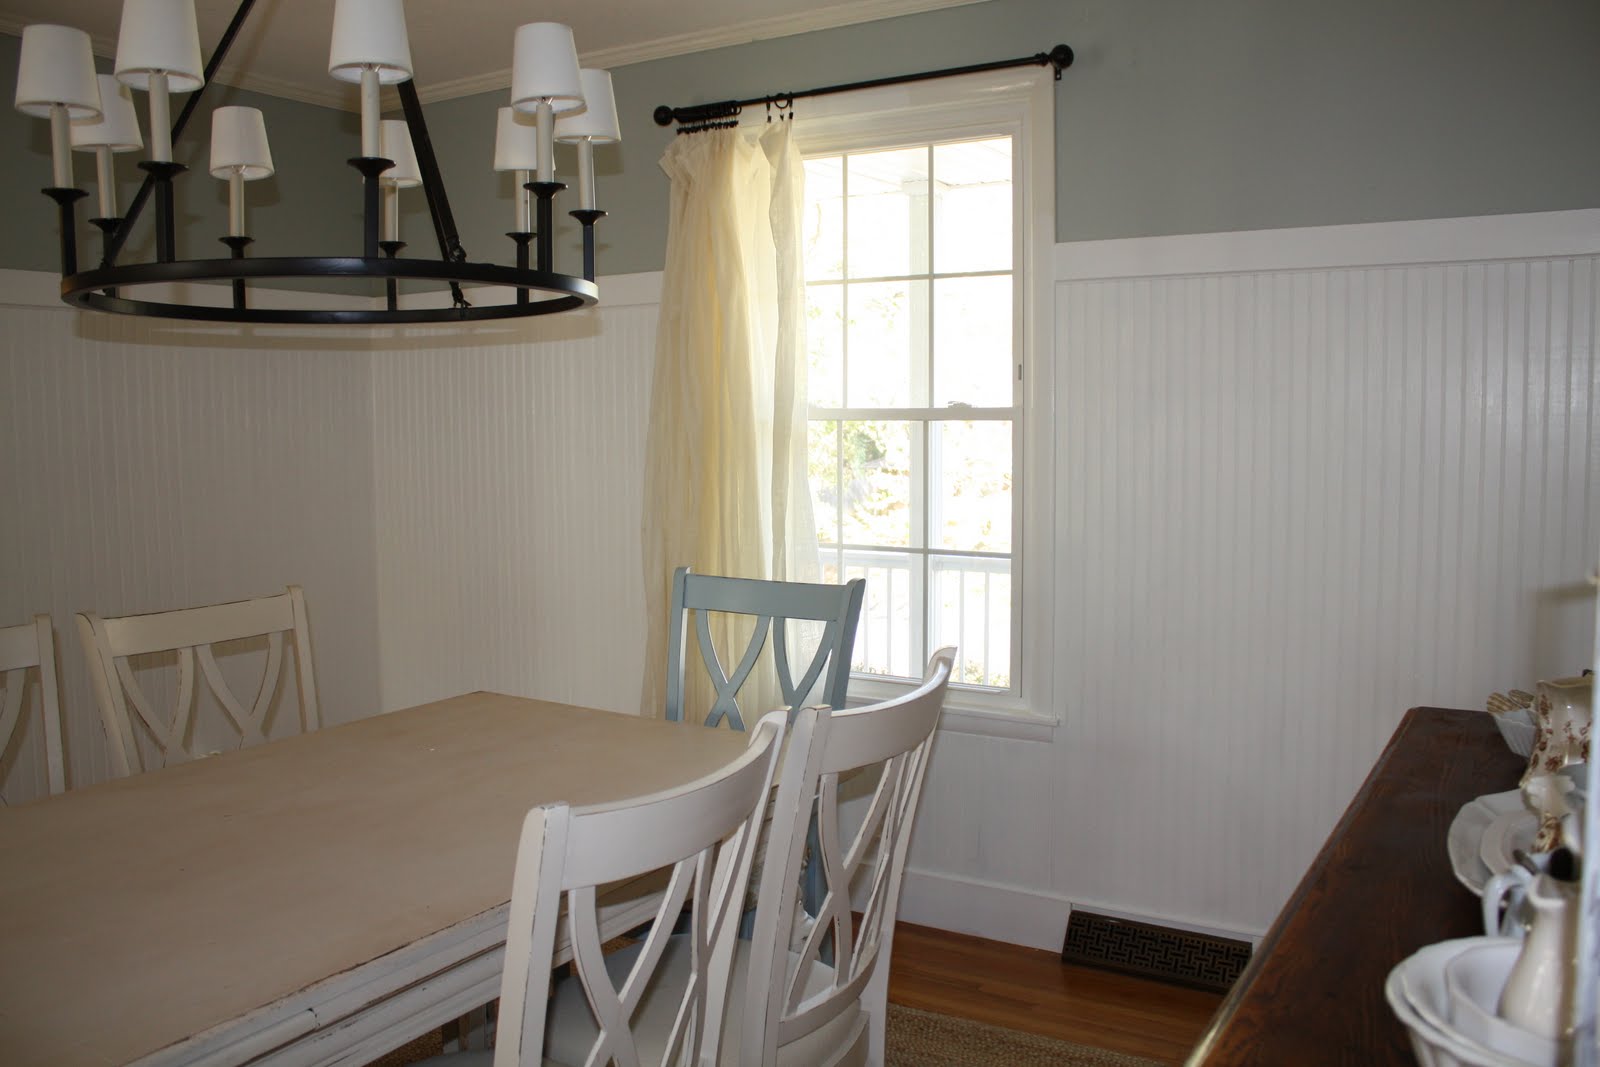
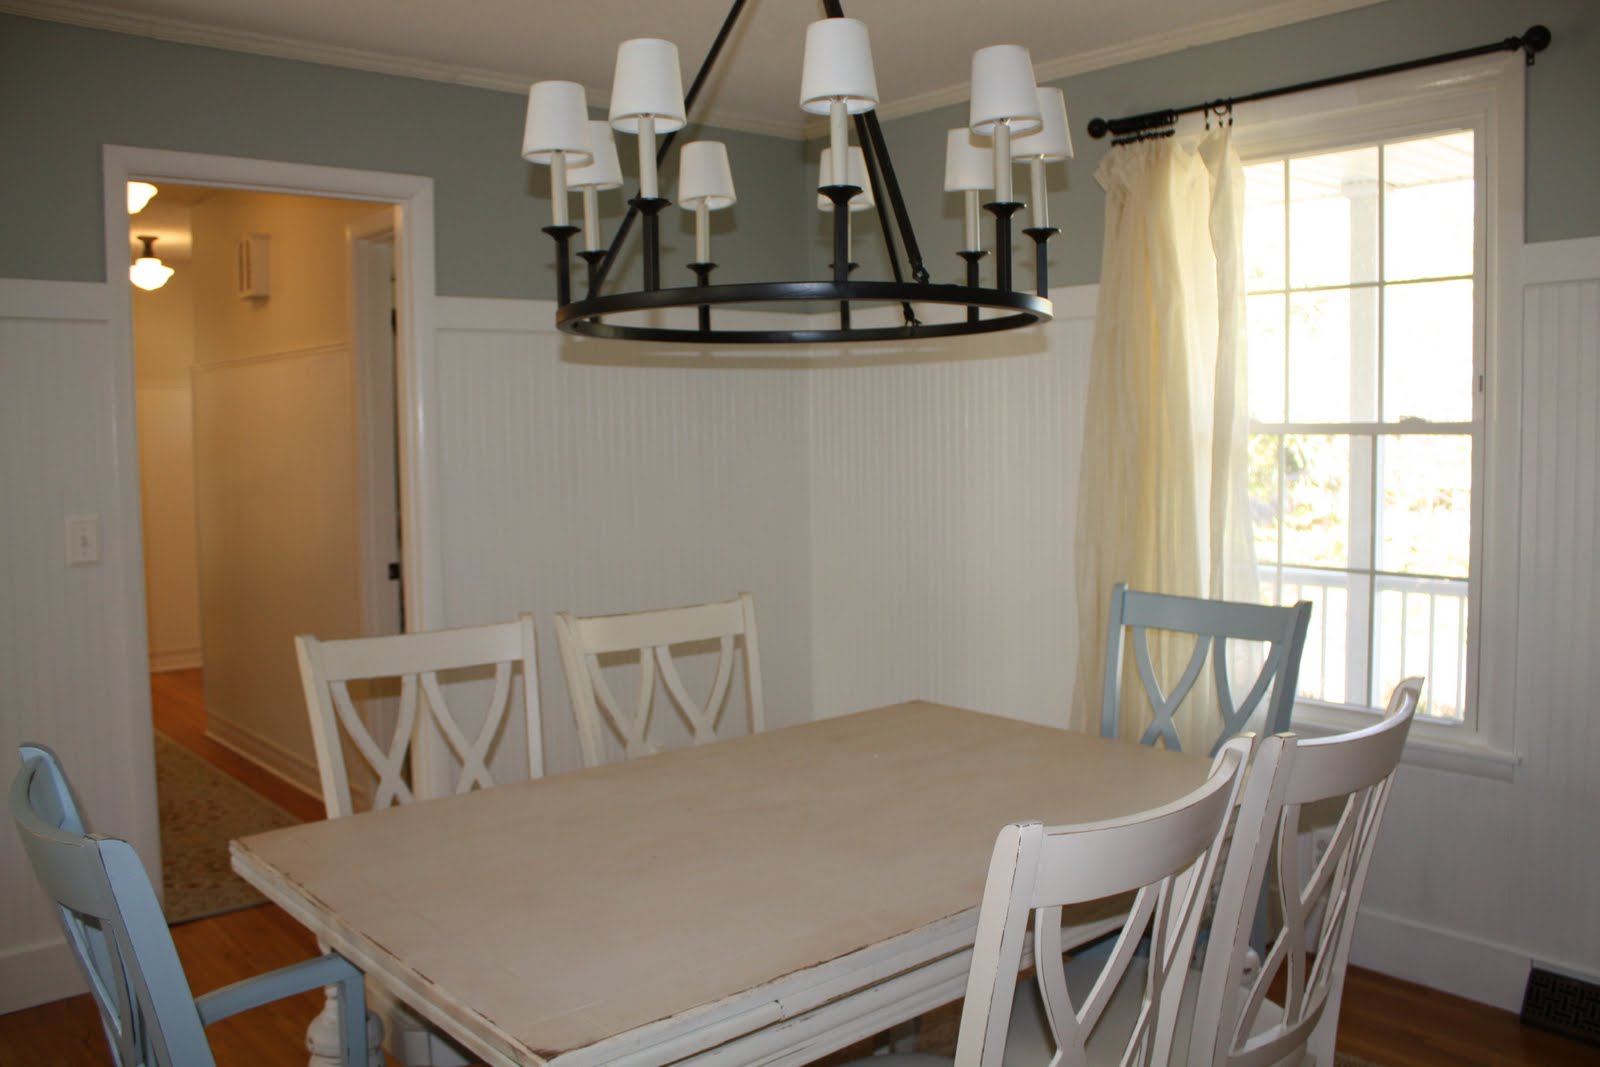
 We still have so much to do.  The crown molding needs to be replaced badly.  We plan on getting some antique chairs for the table and I am going to build a hutch for the buffet.  I probably will make some new curtains for the window as well and of course we need something on the walls. I am having a hard time putting holes in my new walls until I am absolutely certain where and what I want as art.  Is anyone else that way? 


Pin It!

Monday, October 25, 2010

Dining Room Makover- Part One: Lighting...


This is how our Dining room looked the day we moved in.  By far not the worst looking room in the house but nonetheless, I had pictured a little something different. Notice how high the chandelier is hung?? That drove me crazzzzy! 


My impatience once again got the best of me, and I decided to rip down the chair rail and paint the upper portion of the wall.  And, we have lived with this mess for almost seven months.  Luckily, my husband and I recently moved it to the top of our to-do-list and got busy. 

Overstock Old World Chandelier


Pottery Barn Weathervane Chandelier

I found this chandelier at Overstock.com and knew it was exactly what I was looking for.  I loved the Pottery Barn Weathervane Chandelier but it was out of our price range so I thought we could achieve a similar look with the Overstock light.

When it arrived the "candle" color just didn't appeal to me so I turned to my trusty can of spray paint to help me out.


I purchased some small shades at Lowe's and I think the final result makes such a statement.  With the chandelier hanging at the appropriate height the room is much better lit. I am still thinking about a project for the shades to make them look a little more like the Pottery Barn version, but for now they'll do. ;)


We have done so much more to the room, but this post is getting a tad long.  I'll post more tomorrow....hopefully!
Pin It!

Monday, October 11, 2010

Hallway Table Switcheroo...


My mom and dad had this antique washstand in storage, that at one time they were going to use.  Lucky for me, they never got around to it and it became mine. 


It needed some major TLC.  So after nailing and gluing everything back into it's original location, I lightly sanded it and dry brushed on a coat of Benjamin Moore's "Edgecomb Gray".  The paint was no cost because I had a coupon for a free sample color.  I hardly used any of it to coat the entire thing! After the paint dried, I brushed wood stain over the entire piece and then quickly wiped it off, leaving it with more of an aged look.


I had the original drawer handles, but the knobs to the cabinet doors were missing and had to be replaced.  The table I originally had in the entry hallway wasn't really working for me so the washstand took its place.


Linked at:


Furniture Feature Fridays

Photobucket
Pin It!

Thursday, September 9, 2010

Historic Home, Historic Charm: Ploger-Moneymaker Home, Lebanon, MO....


While home visiting my parents, I had the opportunity to view a beautiful home listed on the National Register of Historic Places.  The house was originally built for Milan W. Serl by a contractor named Walters in 1870. Walters reportedly named the house "Aambler".  The Plogers moved in about 1903, renting the house until they could purchase it in 1910.

The Lebanon Historical Society hosted an ice cream social with a tour of the Ploger-Moneymaker Place. For years this home has set empty and no tours were allowed to the public. Story goes when the daughter of Mr Ploger died, she stated no tours were to be given and the house remain in it's original, untouched state.  But as funds for upkeep and repair begin to dwindle, the city has decided to now allow tours in the best interest of the property.  They are hosted annually and this year they presented the first floor only. Next year, they hope to have the second floor open. It is such a treasure that places like this still exist. I think as Americans we need to take more pride in preserving our architectural history and heritage. 


Pin It!
Related Posts Plugin for WordPress, Blogger...