
The post title says it all-I reupholstered a wing back chair- by just winging it! Never have I ever reupholstered anything more difficult than a dining chair cushion. But I didn't want to spend money on hiring an upholsterer to recover 2 chairs. Plus, I have tons of DIY spirit I need to constantly channel into something.
This is what I started with...2 of these lovely chairs. The bones were in great shape-they just needed some new fabric and a little TLC.

I started out watching a couple of YouTube videos which were mildly helpful, and then I just went for it. I mean, I couldn't mess up that old green fabric. If it failed, it still would have looked better than it started out looking!
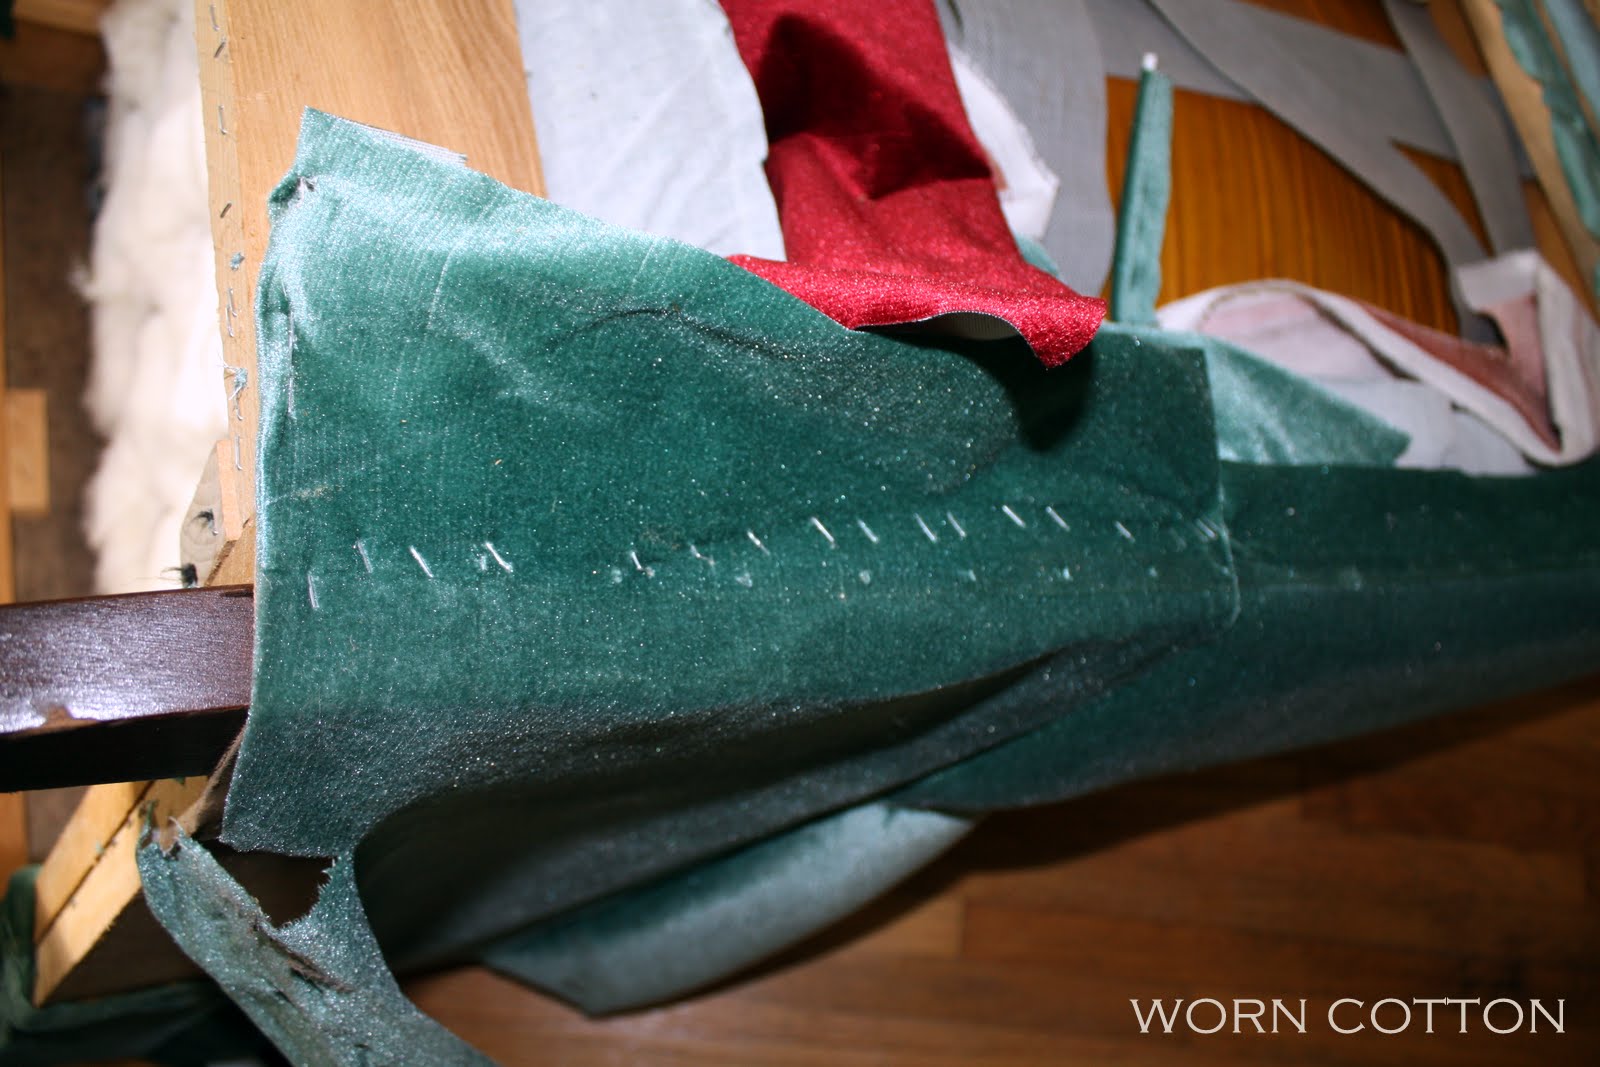
First, I removed all the fabric piece by piece, very carefully, so I could use it as a pattern of sorts for my new fabric. This was the most grueling part. I stabbed myself with my screwdriver and cut my hands on the staples a million times. Wearing gloves would have been smart. ;)
Just look at all those evil staples!!
I took pictures of how the fabric was stapled on in case I needed a reminder later on. It helps to also jot down what order you remove each piece. Then when you reupholster, just start with the last piece you took off. I basically learned as I went along.
I have to mention, I have a pneumatic staple gun and an air compressor. I don't think I could have tackled this project without one.

I decided to paint the legs. I used regular latex paint and finished them with a dark brown paste wax. I like them so much better!


(We are working on installing new base boards in here. Please ignore them in their unpainted, unfinished state.)
I also want some pretty pale yellow pillows to go in each chair but, I haven't found one I am in love with yet. Any suggestions?? :)

Linking up at:


Great job! Pretty fabric
ReplyDeleteThank you!!
ReplyDeleteLove it! And love the jute trim. Can not believe this is the first time you have reupholstered. Very impressive. Thanks for sharing, liz
ReplyDeleteThank you so much, Liz!
DeleteHoly Cow!! I'm more than totally impressed you did this!! It turned out beautifully!! Lots of explaination points from me.
ReplyDeleteKate
The Jolly Dog House
Thanks Kate!
DeleteWOW! What a chic looking chair! Thank you for linking this up to "Cowgirl Up!".
ReplyDeleteoxox,
Linsey
Thanks Linsey! I appreciate your linky parties each week! :)
DeleteSo fabulous! Your chair looks perfect. Did you use any cording? I didn't see any but don't even miss it. I have similar chairs staring at me for a re-do. Ready to tackle them but I'm a little scared...your beautiful end result gives me encouragement!
ReplyDeleteThanks Jennifer! No, I didn't use cording. It was actually only on the wing part before and I was too scared to try it. Cording scares me more than ripping apart an entire chair and starting from scratch...go figure. Good luck with your chairs...you can do it, I promise! Maybe I will get brave and try cording on something else. :)
Deletethats unbelievable. I don't think I could do that. It looks professionally done. Honestly. I like that you said that you have tons of diy spirit. It is so inspiring to me. have a great day!
ReplyDeleteMC
Thank you and thanks for stopping by! You have such a wonderful blog! Can't wait to see more!
DeleteWOW!!! I am so impressed! The chair looks fabulous! Now I'm really regretting giving away my wing back chair (just because it needed to be recovered) Well, after seeing yours, I'm going to find me another chair! Thanks for the tips and for inspiring. I'm excited to be your newest Linky Follower!
ReplyDeleteSharon @ mrs. hines class
Thank you, Sharon! And thanks for following! Good luck finding just the right chair!! :) Isn't Pinterest great?? What did we ever do without it?? ;)
Deletep.s.
ReplyDeleteI'm going to be pinning this chair to my design inspiration board so that I will have the tips handy when I get to "try this at home."
Sharon @ mrs. hines class
Wow, looks absolutely fabulous - great wing chair redo!
ReplyDeleteThank you! :)
DeleteYour first big project?? It came out fabulous, love the fabric too.
ReplyDeleteYep, about halfway through removing the fabric I thought I had gone crazy. But, glad I persevered! Thank you for stopping by!
DeleteMy gosh! I would never attempt to do something like this. I am so impressed. I love the fabric, too. My sister-in-law has this same fabric in her dining room. I love the colors in it. She used white linen with hers. A pillow made from white linen with that cute jute trim would be really cute in your chair.
ReplyDeleteThanks, Jane! Linen would look lovely! Thanks for the suggestion. I will have to update when I finally get around to making/buying pillows for it! Thanks again for stopping by!
DeleteOMG! You totally rocked this chair! Thanks so much for linking up to Cowgirl Up! Hope to see you again next week!
ReplyDeleteThanks,
Amanda
http://www.theivycottageblog.blogspot.com
Thanks Amanda!!
DeleteThis looks amazing! Good for you!
ReplyDeleteThank you, Sandra!
DeleteThis looks great!!! I am in the process of reupholstering wing back chairs. I am 90% complete with one of them and I just cannot find the motivation to finish or start the other one. My hands are still healing!!
ReplyDeleteOh Andrea, I hear ya! It is rough on the hands!! I have so much more respect now for professional reupholsters. :) Good luck getting motivated! Thanks for stopping by.
DeleteRachel
Rachel- I have two identical chairs half torn to bits in my bedroom right now. I was starting to feel a little (lot) overwhelmed. I will keep coming back to stare at these beauties to get me through the process. I have chose you to receive the Liebster Blog Award :) Check out my page for more details!
ReplyDeletexo-Chris {aka Freckle Face Girl}
Wow!! Thank you Chris! What a great treat to come home to. Greatly appreciated...and I am YOUR newest follower. You have a great blog! :)
DeleteAlright lady...I'm totally stuck on the wings. I guess mine are a bit "wingier" than yours, but no matter what I do I either have big folds or a giant seam. AKK! How did you get your wings so smooth?
DeleteChris
Okay...the wings were tough for me too. I tried several different ways and settled on folding them at the top. I pulled each side really taut on the back side. Fold a little and staple...repeat. But, I did start out thinking I would sew two sides together with some piping in the middle. A slipcover of sorts. If you are better at sewing then I am, you could always try that. Also, maybe try lightly ironing on your fold to help it lay down better. I hope this helps. Let me know if I can TRY and help again. ;)
DeleteWhat a beautiful transformation! WOW!!! Megan
ReplyDeleteThank you, Megan!
DeleteFantastic, love the fabric!
ReplyDeleteHello! I found you via Pintrest as I have a similar chair to recover! How much fabric did you need for each chair- sorry if this is a repeat question. Your chairs are lovely!
ReplyDeleteHi! Thanks for the inquiry. If I remember correctly, I used appx. 7 yards per chair. I used a different fabric for the back so you might need to adjust for that. It might also depend on what pattern your fabric is. I hope this helps some. Let me know if you have any other questions. Good luck with your chairs!!
Delete